- Login to your back office
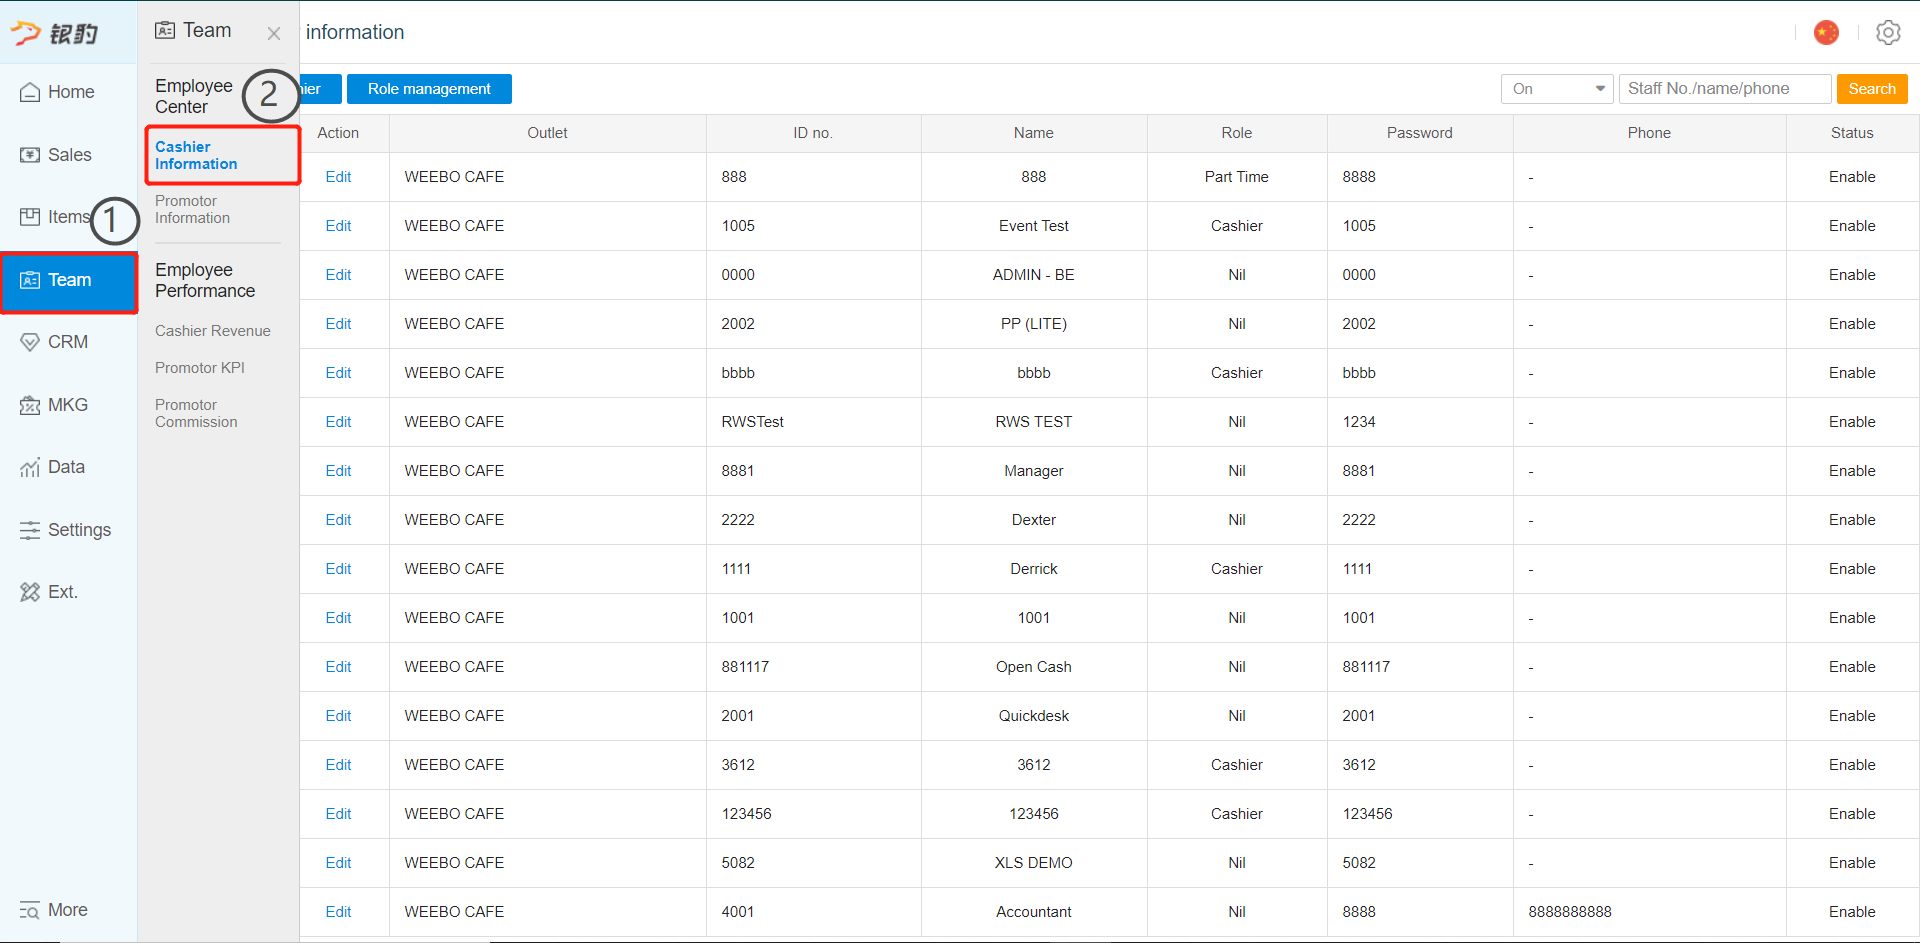
- Click on "Cashier's Information" subcategory under Team main category
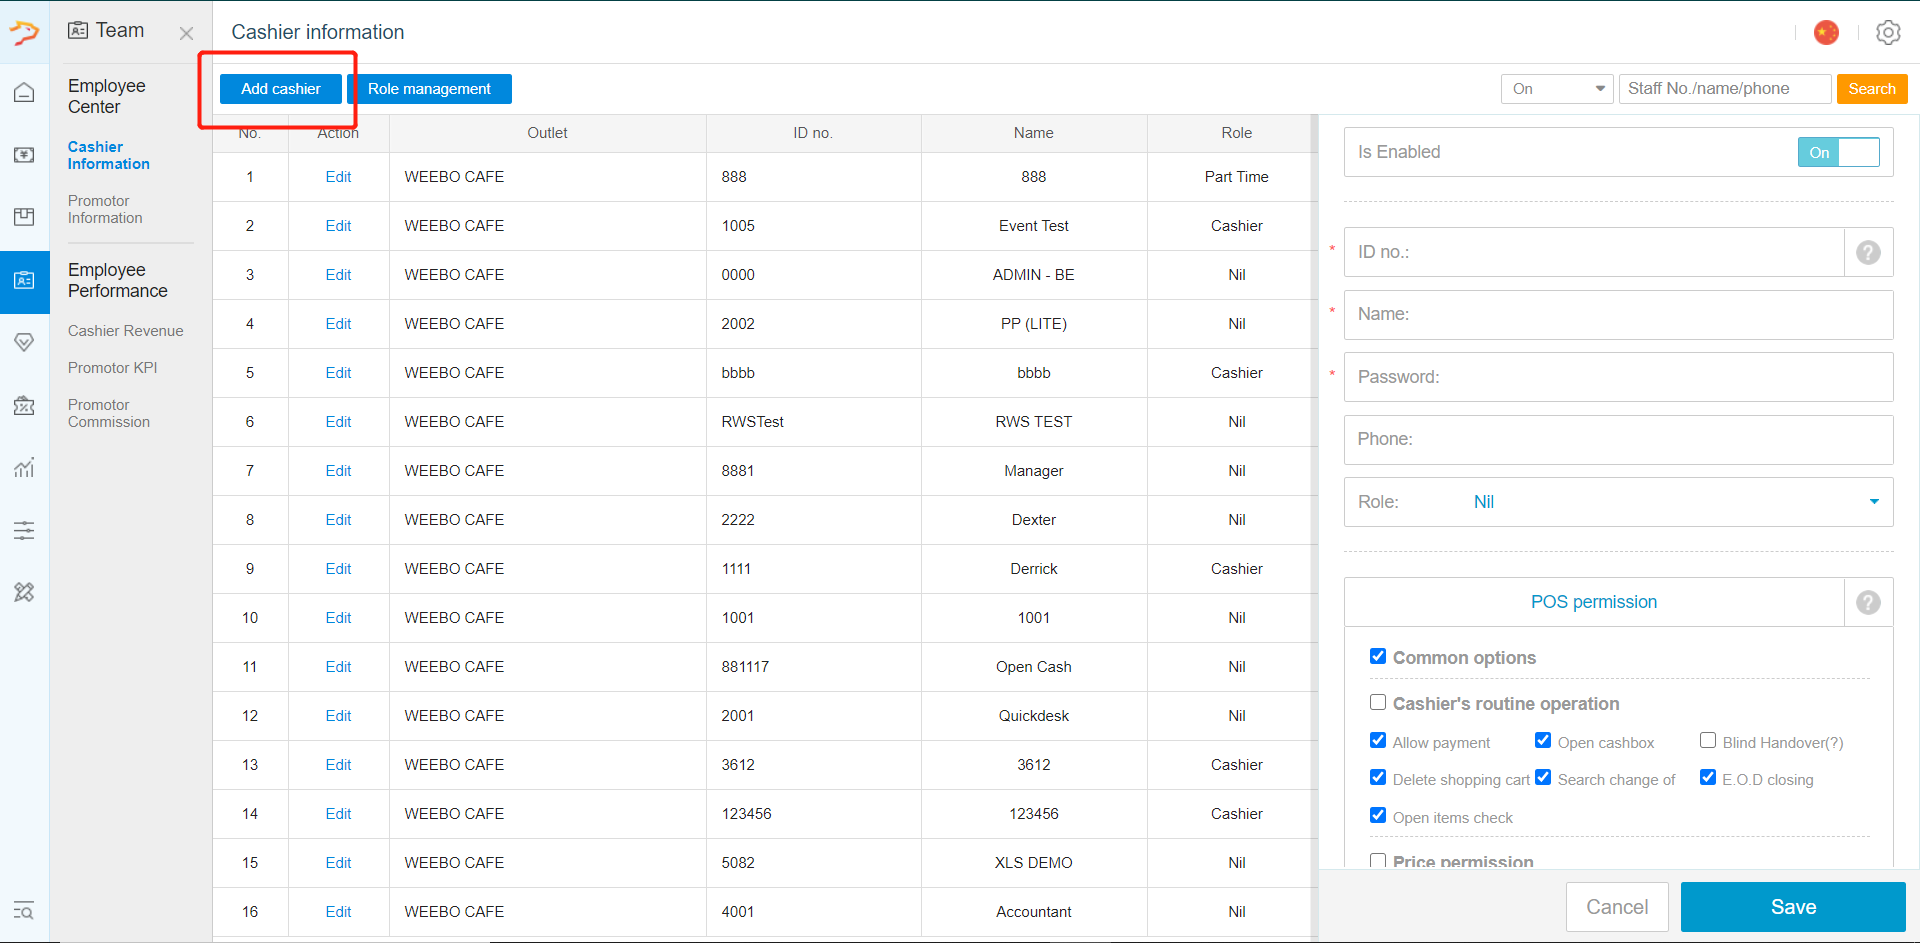
- Click on "Add Cashier" to create a new cashier
- Enter the respective information (fields marked with * means that it is compulsory)
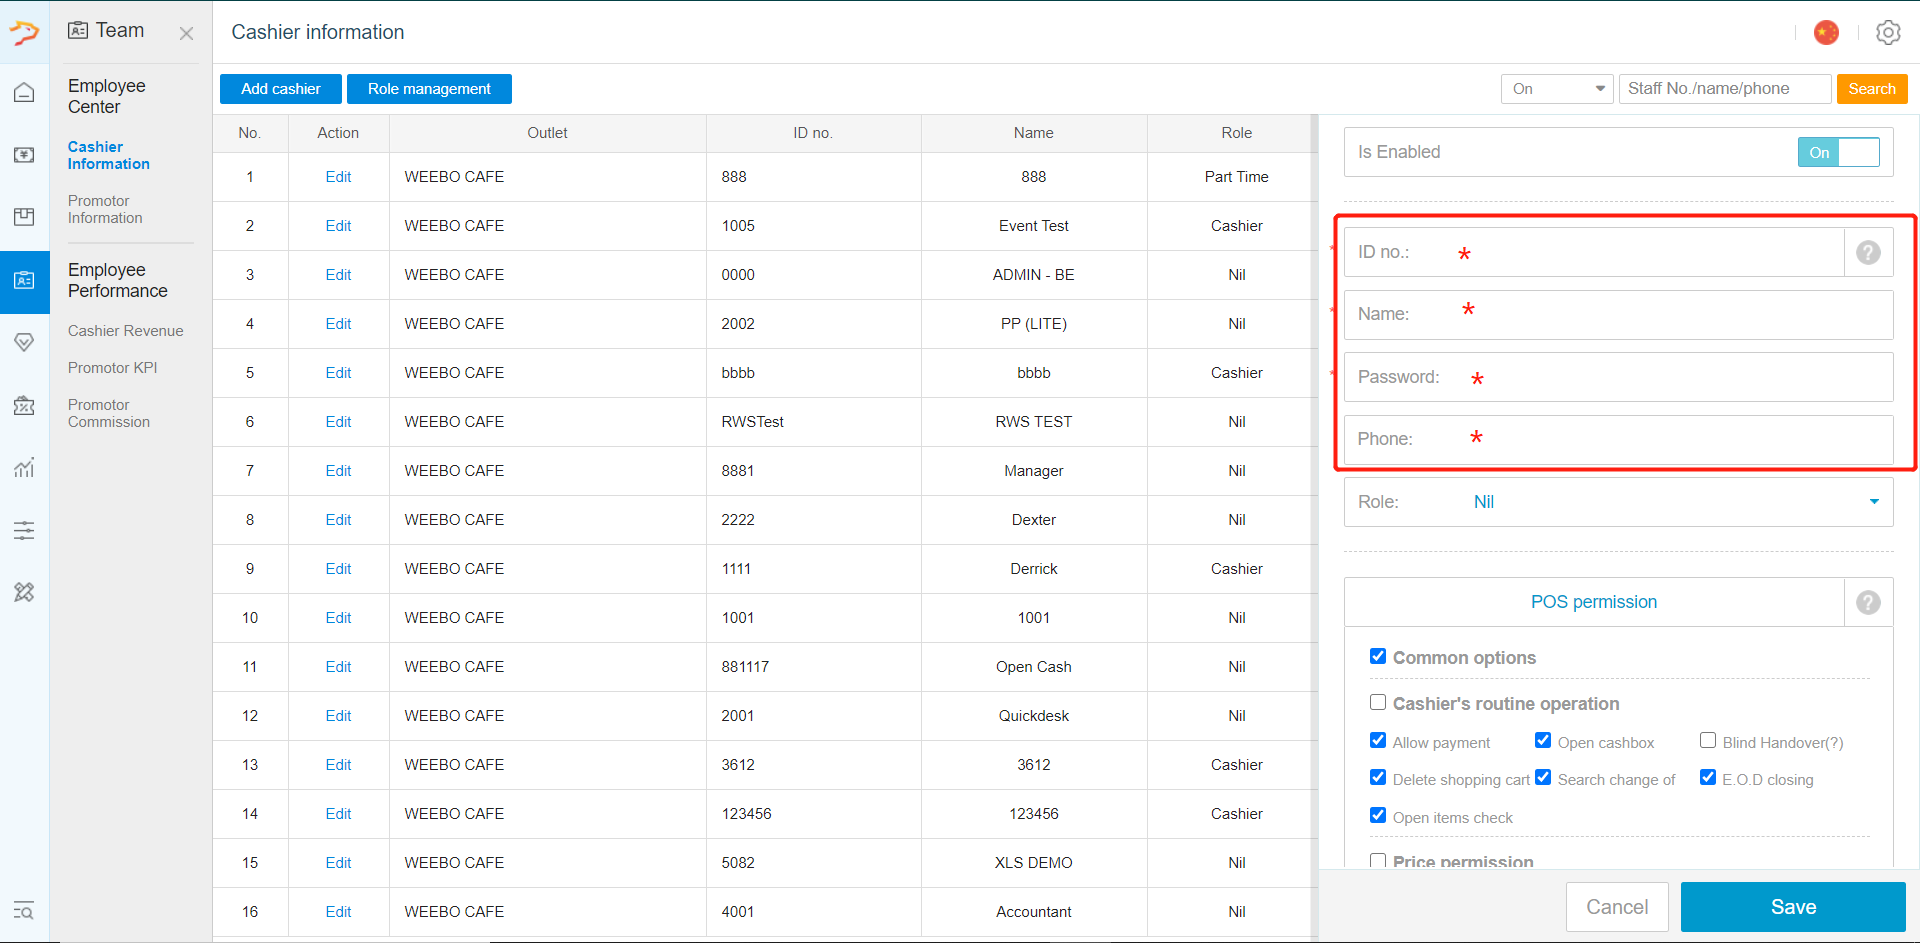 (1) ID No.; cashier's login ID
(2) Name; cashier's name
(3) Password; cashier's login password
(4) Phone; cashier's phone number (optional)
(5) Role; select a predefined role for the cashier (cashier's rights will automatically be adjusted if a role is assigned)
*NOTE: "ID No." is a unique ID assigned to each member and cannot be re-used once taken within the system (similar to a barcode) - Select the specific front and back office rights for the cashier (this step can be skipped if roles are predefined via "Role Management")
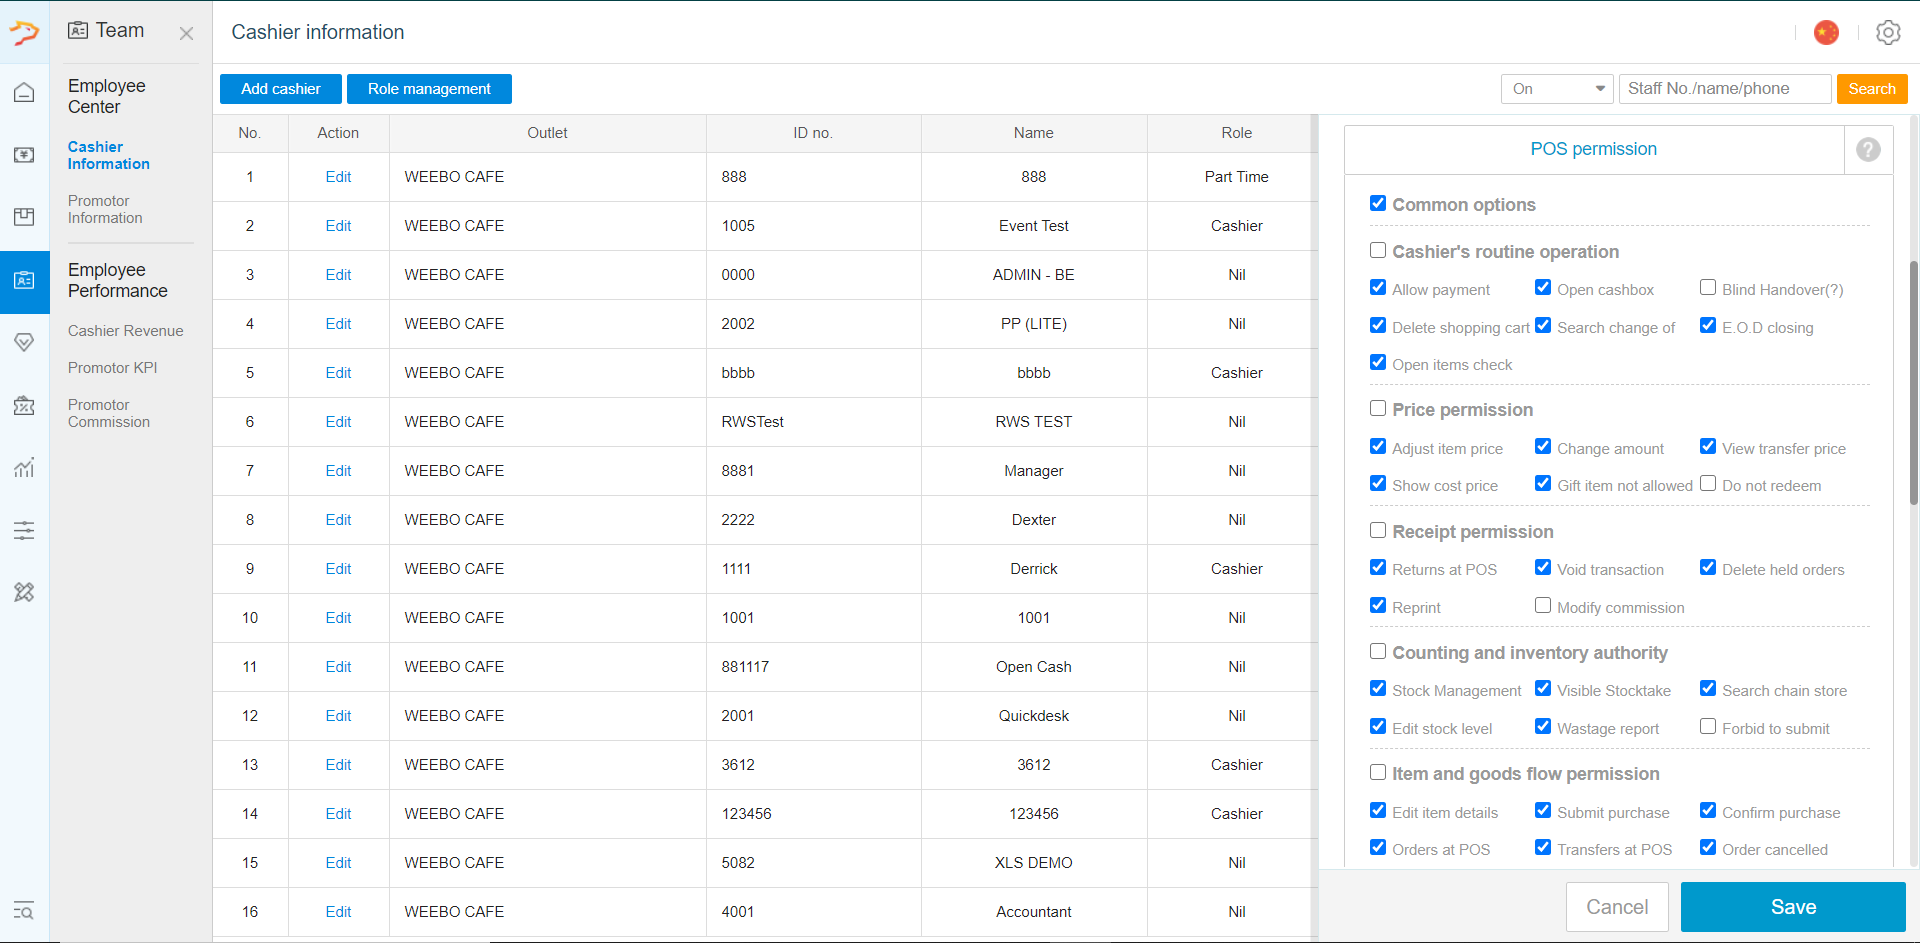
- Once done, click on "Save"
- To edit existing cashier's info, click on "Edit"
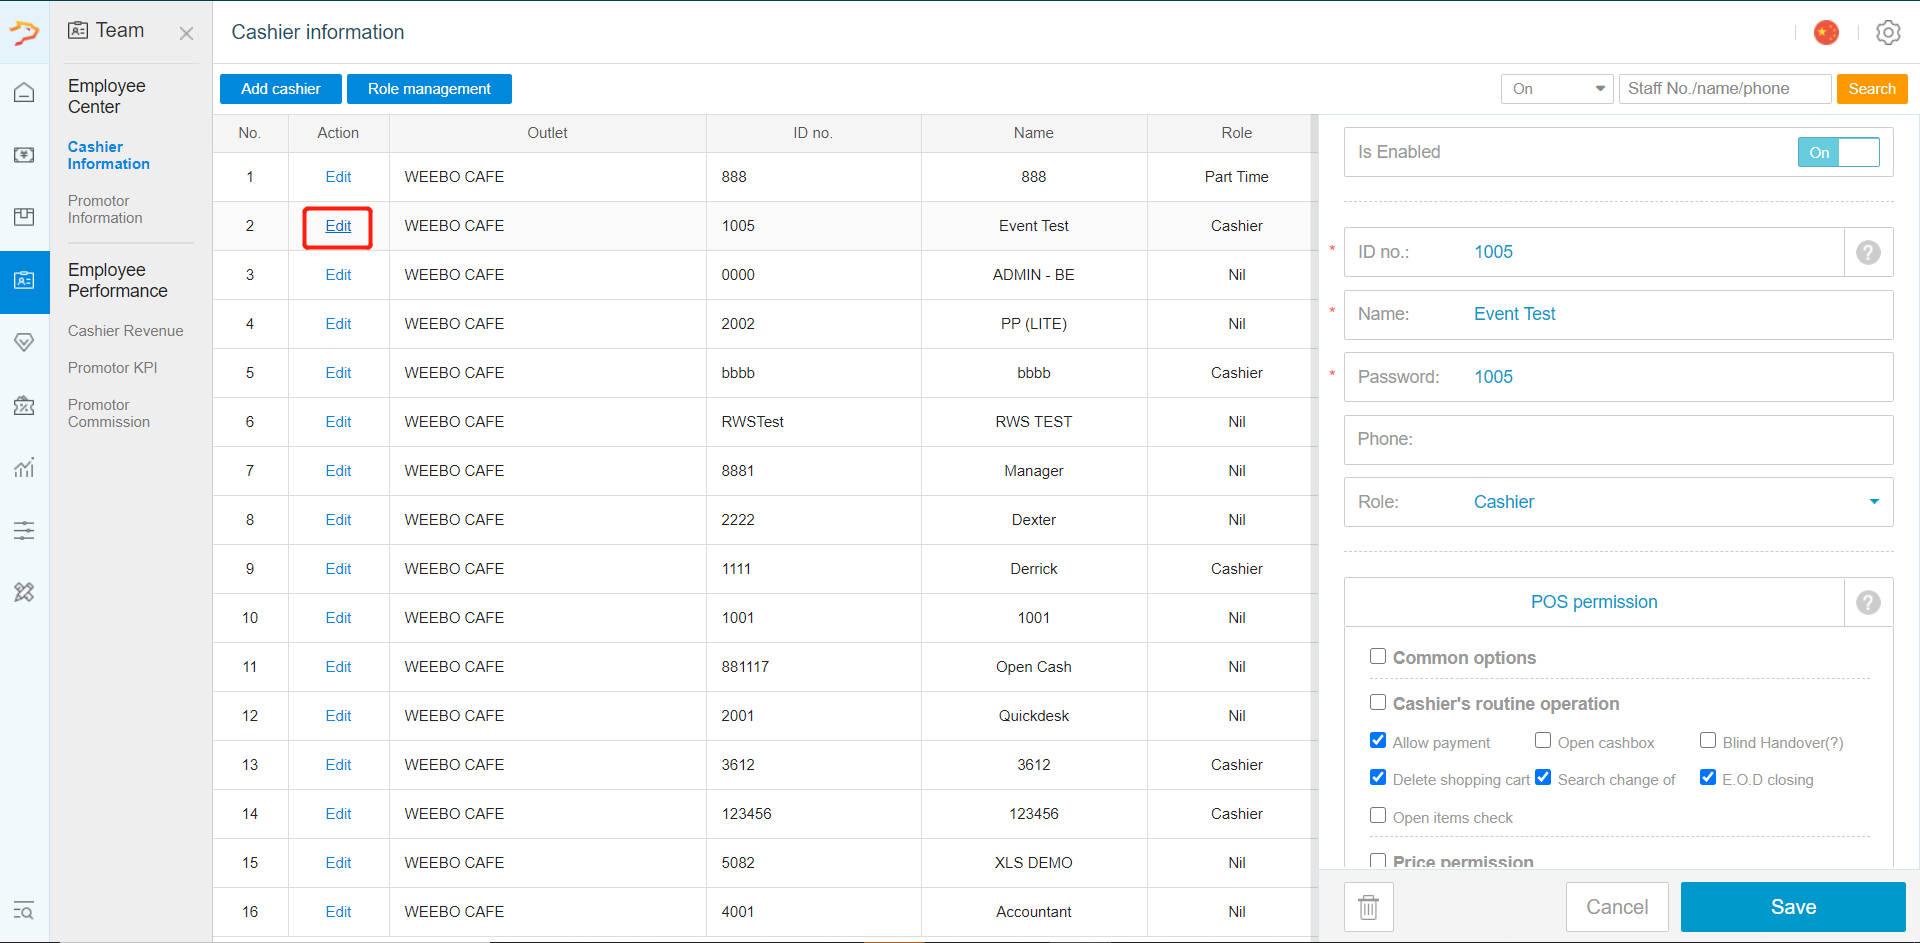 *NOTE: Once a cashier information has been saved, the "ID no." can no longer be edited
Was this article helpful?
That’s Great!
Thank you for your feedback
Sorry! We couldn't be helpful
Thank you for your feedback
Feedback sent
We appreciate your effort and will try to fix the article